Kimi K2 leverages a powerful 1-trillion parameter Mixture-of-Experts (MoE) architecture, activating only 32 billion parameters per token. This design makes it highly efficient for agentic coding tasks, providing the reasoning depth of a massive model with the latency profiles required for autonomous workflows. By treating Kimi K2 as an agent, developers can offload complex tasks like multi-file refactoring, bug triage, and test generation to an autonomous system.
In this guide, you will learn how to integrate Kimi K2 into your development pipeline. We will walk through configuring the client, defining executable tools for file system manipulation, and structuring an agentic loop that enables the model to autonomously plan, execute, and verify code changes.
Video guide
Prerequisites
- An active API key for your chosen inference provider.
- The official OpenAI Python SDK (or compatible Node.js package) installed.
- Basic familiarity with JSON Schema for tool definitions.
- A development environment configured to run and test generated code safely.
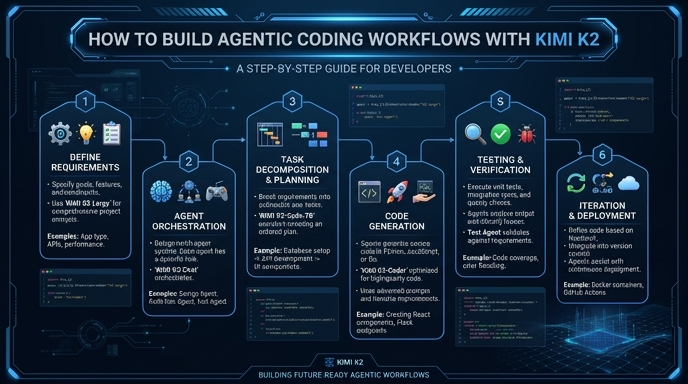
Steps
- 1
Initialize the API Client
Instantiate the OpenAI client by pointing the base_url to the endpoint provided. Ensure you inject your API key securely using environment variables to avoid credential leakage.
- 2
Define Functional Tools
Create a schema for the tools your agent will use, such as 'read_file', 'write_file', and 'run_test'. These tools must explicitly describe their purpose and arguments using standard JSON Schema.
- 3
Set Up the System Prompt
Write a robust system prompt that defines the agent's persona as an expert software engineer. Clearly instruct it to decompose complex coding tasks into granular, sequential steps before executing any modifications.
- 4
Implement the Execution Loop
Send the user's coding request to the model. If the response contains tool calls, execute the corresponding local functions, append the tool outputs to the conversation history, and call the API again with the updated context.
- 5
Verify and Finalize
Once the agent signals completion, perform a final review of the diffs or code output. Integrate automated test runners to validate the agent's work before merging or applying changes to your repository.
Code
from openai import OpenAI
import json

client = OpenAI(base_url="https://api.select.ax/v1", api_key="YOUR_API_KEY")

tools = [{
    "type": "function",
    "function": {
        "name": "write_to_file",
        "description": "Writes code content to a specific file path",
        "parameters": {
            "type": "object",
            "properties": {
                "path": {"type": "string"},
                "content": {"type": "string"}
            },
            "required": ["path", "content"]
        }
    }
}]

response = client.chat.completions.create(
    model="smart-select",
    messages=[{"role": "user", "content": "Create a simple 'hello world' script in script.py"}],
    tools=tools,
    tool_choice="auto"
)

print(response.choices[0].message.tool_calls)
Pro tips
Strict Schema Validation
Always enforce strict JSON Schema for your tools to ensure the model provides parameters in the exact format your internal functions expect.
Context Window Management
When working on large codebases, summarize previous agent actions into the system message to conserve tokens and maintain coherence over long sessions.
Iterative Testing
Implement a 'self-correction' phase in your loop where the agent is forced to run linter or compiler feedback as a tool output before finalizing its solution.
Visual guide
Route your models intelligently
Use one API key for routing, fallback, and cost control across model providers.
Route your models intelligently — try Select